Images
With Icon Map Slicer, you can place images on the map. Images can be sized and rotated based on fields in your data.
Data setup
In order to display an image on the screen the following fields must be provided:
- ID - a unique identifier for this item
- Longitude
- Latitude
- WKT / WKT / GeoJSON - this field should contain the URL of an image (unless using "Custom URL" or "Icon Library" as the Image Source).
Sample data
| ID | Longitude | Latitude | Destination Longitude | Destination Latitude | Circle Size | Column Height | H3 Weight | Image / WKT / GeoJSON | Feature Reference |
|---|---|---|---|---|---|---|---|---|---|
| Image1 | -2.576 | 51.481 | null | null | null | null | null | https://www.publicsite.com/imageurl1.png | null |
| Image2 | -2.576 | 51.481 | null | null | null | null | null | https://www.publicsite.com/imageurl2.png | null |
Remotely hosted images
Images hosted on public facing websites can be displauyed within your report. All images need to have an https URL. eg:
https://www.publicwebsite.com/imageurl.png
png, jpg and svg images are supported.
Please also note, Cross Origin Resource Sharing (CORS) with an Access-Control-Allow-Origin of * or null, must be configured on the remote server.
Locally hosted images
Should you not wish to host your images externally, they can be stored either in your dataset, or as a Power BI measure and referenced via a data URL:
PNG images can be 64bit encoded and represented as a measure such as:
Small Icon = "data:image/png;base64,iVBORw0KGgoAAAANSUhEUgAAABQAAAAUCAIAAAAC64paAAAAAXNSR0IArs4c6QAAAARnQU1BAACxjwv8YQUAAAAJcEhZcwAADsMAAA7DAcdvqGQAAAPcSURBVDhPZVRbbBtFFJ3ZXXu9trN+xK84jlM1MakTtwSTghScNH0k/WirFgmFRuIHiQgkUMUPPyAhgfitEAWJxwdV/0IlhJAIqBFqm5TSysUoiZK2DsQtduL3I068dtb74q6dpFScHe1Kc+fce+bumcEvTbzr6emXJQntgiSJVL48+zD/3rDT185KskxggiBwMyrLCjwkSf4Z+YPqDg77B8ckUWzGCIy368Livdhxj/z6eZ+N1SkIbfMCV+UR0BVk0NM6WkNRlF5voGRZkiURRpMsIxR+kLhf4r6c6LYaNYIoIIQvf3/nr7WyjaXzm3x3u+mtiRDHcankOgUEBZI3ANqS2fIvseLlk+0HvGZRUuWtxNKZYvXrD8/RWk29Lnzw2bUfp2/EHoZ/vvarSt4D7CfyT2HCawh49J9fuSmIQMa3HuQvvjNiYGhYQDH0a6cODUxeOd9XsdnbnpAxxjW+frdQnTzinF9Y/YQ36gL7BQVJxaUqV9tZhFClWjc6dTRNK7L8VGWMMK0hFlbzi/Fc7+kTjJ6BlOkh6qvp2890tTE6bY0XvvkhctSyiTHI/A9ZURRo41mv9dKdKLZrgjo1N8w7TezUlhJ+/yeTXlviJbGUD7VwhUxeqJXJZ0fHbZ4uRVHXwb+wW4wdZia3/Bi5LZSJVTCuPk5sRVPlYDDpcFVcro0y1yOVTh4fZE2Wp2RD10GPv8tN1f3fXp1F+2zqbDxv6fNrtBoQAmbJejvoTcGzrzueSBANlgpoWBOSJC0/Ss+8OZC8EILxxYnOUqkC8wgTam6Os7dQSLWZskOGmCiKPFhJEOKJVMgsHQsF2lxWGK+cGjhYzmRSuVxpI5vKOlPrz/c6gKIgRZXdqCbPXb+7mi7TGnIlU7n0sg8c3kiL2BYmYCaHUVKHKKTFlTZeETmEDBBSyeD69Hrq+qOittML4pBR+Hgmdm70UIe7FaJz4RV/p/WN8UFoKsZEqVT8bmqKPWyBkmT/2KsWV+fszfCa3syC1wmsp7WFbSE1H12Krs3cjl6di709/gJr1IH/AEajkWHopeUloS482XPjo74aPVfWddaP/qZSSsvFC8dcdhb2pcYQgtb09h20Wdj7y4sEJKM0muBzB1A2V+HrVVEsVSo+xGvNrcigmxzzuR3mvZOzhyMjR00GummS/XoDQ2wUpGzOVq+2blccbsfsFvHpYetQwA5na4exC6jHMHo4rRRBkARJQh9HRkNDogTyJVmZno+fJaQzL3aQFIXl/9VVbxuKghFb+F3ga3ANNWyguoCvi5HFtf4e9rcbq7tld+6gRkMAGM555F74X30ewZd5ZPhqAAAAAElFTkSuQmCC"
There are many websites available that can encode your images for you.
SVG images can be represented as follows. Note spaces and special characters have been URL encoded:
star = "data:image/svg+xml;utf-8,%3Csvg%20width%3D'263'%20height%3D'224'%20xmlns%3D'http%3A//www.w3.org/2000/svg'%20xmlns%3Axlink%3D'http%3A//www.w3.org/1999/xlink'%20xml%3Aspace%3D'preserve'%20overflow%3D'hidden'%3E%3Cg%20transform%3D'translate(-627%20-404)'%3E%3Cpath%20d%3D'M635.5%20491.713%20729.464%20491.713%20758.5%20411.5%20787.536%20491.713%20881.5%20491.713%20805.481%20541.287%20834.518%20621.5%20758.5%20571.925%20682.482%20621.5%20711.519%20541.287Z'%20stroke%3D'%2344676A'%20stroke-width%3D'4.58333'%20stroke-miterlimit%3D'8'%20fill%3D'%23A7F5FB'%20fill-rule%3D'evenodd'/%3E%3C/g%3E%3C/svg%3E"
Dynamic SVG images with DAX
One of the benefits of using SVG images, is that they can be dynamically constructed with DAX. For example the color of the star in this example is set using a variable in DAX:
Star =

VAR StarColor = "FF0000"

RETURN
"data:image/svg+xml;utf-8,%3Csvg%20width%3D'263'%20height%3D'224'%20xmlns%3D'http%3A//www.w3.org/2000/svg'%20xmlns%3Axlink%3D'http%3A//www.w3.org/1999/xlink'%20xml%3Aspace%3D'preserve'%20overflow%3D'hidden'%3E%3Cg%20transform%3D'translate(-627%20-404)'%3E%3Cpath%20d%3D'M635.5%20491.713%20729.464%20491.713%20758.5%20411.5%20787.536%20491.713%20881.5%20491.713%20805.481%20541.287%20834.518%20621.5%20758.5%20571.925%20682.482%20621.5%20711.519%20541.287Z'%20stroke%3D'%2344676A'%20stroke-width%3D'4.58333'%20stroke-miterlimit%3D'8'%20fill%3D'%23" & StarColor & "'%20fill-rule%3D'evenodd'/%3E%3C/g%3E%3C/svg%3E"
Icon Library
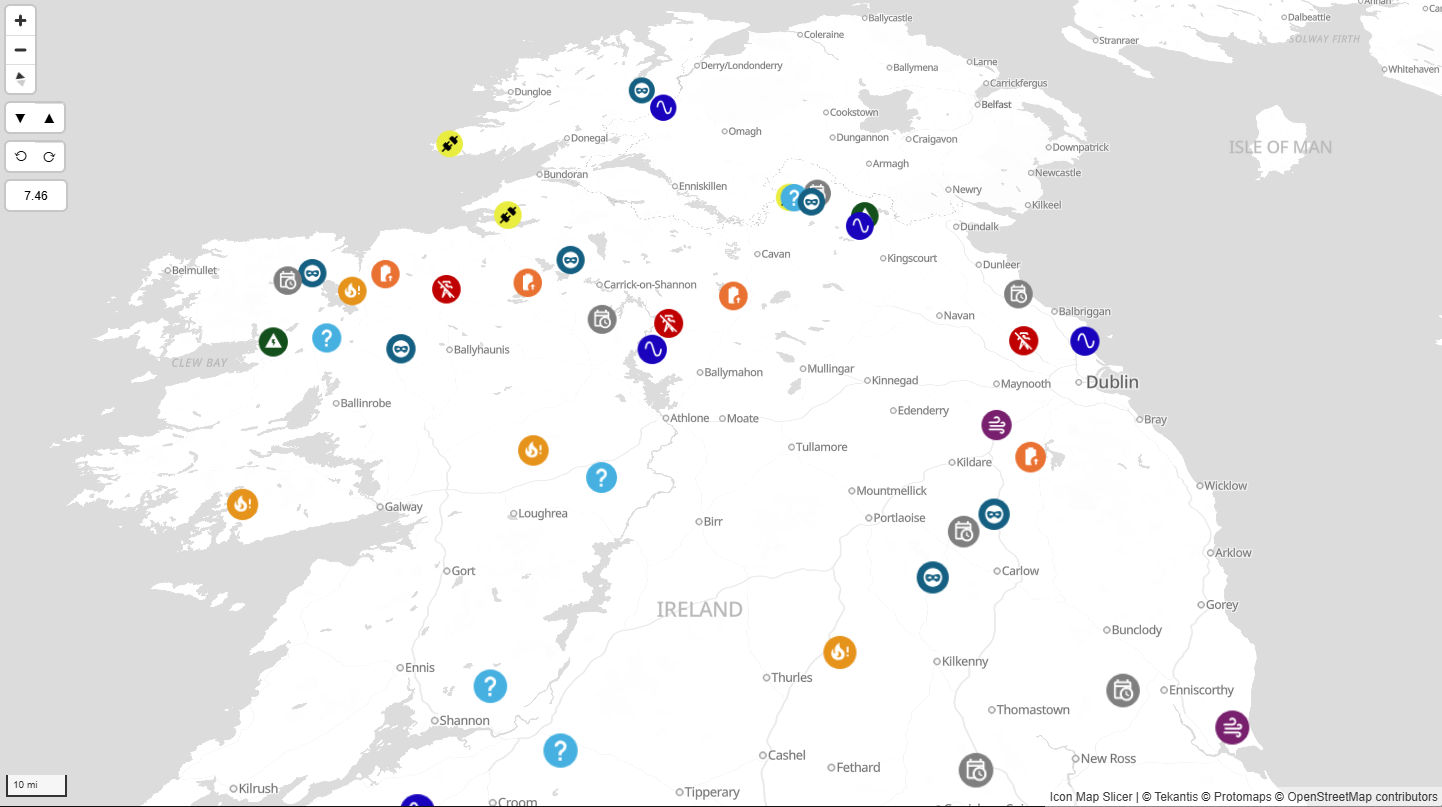
Icon Map Slicer provides a searchable library of icons that can be added to your map.
Images configuration
In order for images to render, the "Images" toggle must be enabled the "Data Layers" section of the Power BI formatting settings for Icon Map Slicer. This section describes the configuration options for images:
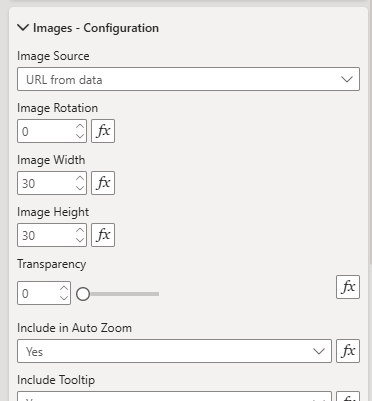
Image Source
Image source determines where the URL for your image or icon is sourced from.
- URL from data. This option is used where you hve a measure or field in your Power BI model that contains a URL of an image. With this option selected, you must drag the field into the "Image / WKT / GeoJSON" section.

- Custom URL. This option allows you to type a URL of an image. The URL can be specified using DAX expressions and applied with the "fx" button so that you can rules to determine which image should be displayed.

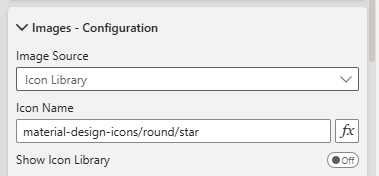
- Icon Library. The Icon Library allows you to pick from a range of in-built icons hosted by Tekantis. Selecting "Icon Library" as the source will display "Icon Name" for you to enter the name of the icon.
Clicking the "Show Icon Library" toggle button will show a popup allowing you to search and select an icon.
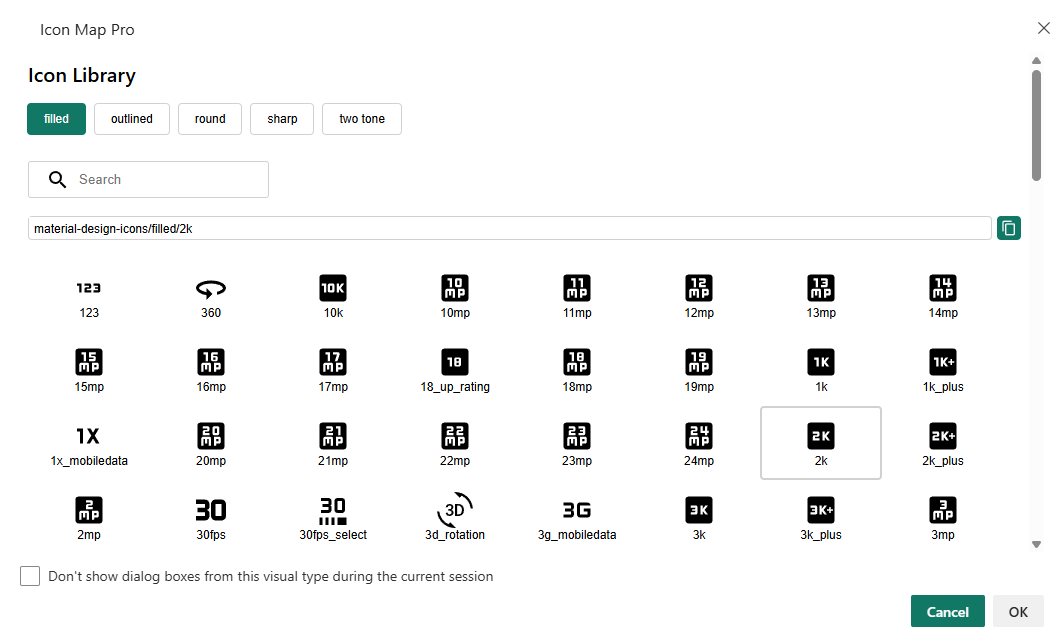
Select an icon by clicking on it, then press ok and the Icon Name box will be populated with the name of the icon you selected.
Alternatively you can click the "Copy" button to copy the name of the icon to the clipboard. This can be useful when using DAX expressions to configure rules to display different icons.

When using icons, you can pick the color for the icon:

Image Rotation
This should represent a number between 0 and 359 and represents the number of degrees to rotate the image. This can be hardcoded, or set using conditional formatting from a DAX measure or field value. This is particularly useful when your image represents a vehicle and you need it to point in the direction of travel.
Pitch Alignment
Controls how images are aligned relative to the map's viewing angle and perspective. Set to "Map" to make images tilt and adjust their orientation to match the map's pitch (the angle at which you're viewing the map from above), creating a more realistic 3D effect where images appear to lay flat on the map surface. Set to "ViewPoint" to keep images always facing directly toward the viewer regardless of map pitch. "Map" alignment is particularly useful for icons representing buildings, vehicles, or other objects that should appear to be part of the map's terrain.
Image Width and Height
These settings allow you to set the size of the image and represent the width and height in pixels.
Transparency
Represents the percentage transparency of the image and should be a numeric value between 0 and 100.
Include in Auto Zoom
Add this image to the auto zoom of the map, whem your data updates. Can be set to yes or no using conditional formatting to apply to specific images.
Include Tooltip
Enable tooltips on this image. Can be set to yes or no using conditional formatting to apply to specific images.
Selectable
Whether the image can be selected for cross-highlighting or drilldown. Can be set to yes or no using conditional formatting to apply to specific images.
EPSG (Coordinate Reference System)
Allows you to specify a specific reference system for your coordinates. The default used is EPSG:4326 / WGS84 and expects longitude and latitude coordinates. You can use other coordinate systems by specifying the relevant EPSG number. For example, to use British National Grid coordinates, enter 27700. Other EPSG codes can be found here.

Minimum & Maximum Zoom
The zoom levels between which this layer should be displayed.